How to Rip Denim Like a Pro: A Step-by-Step Guide for Customizing Your Jeans
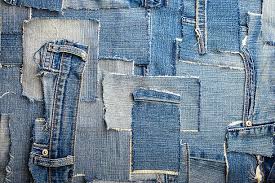
Ripped denim has become a staple in modern fashion, offering a cool, edgy, and effortlessly chic look. While pre-ripped jeans are widely available, customizing your denim gives you control over the placement, size, and style of the rips. Whether you want subtle fraying or bold tears, here’s a detailed guide to help you create the perfect distressed denim look.
Tools You’ll Need
Before starting, gather these essential tools for ripping denim:
- A pair of jeans (new or old).
- Sharp scissors or a craft knife.
- Sandpaper or a pumice stone.
- Tweezers.
- A piece of cardboard or a cutting board.
- Chalk or a washable fabric marker.
Step 1: Choose Your Denim
- Lightweight denim is easier to rip and gives a more natural fray.
-
Thick denim creates a rugged, bold look but requires more effort to distress.
For best results, start with jeans you no longer wear often, just in case the experiment doesn’t go as planned.
Step 2: Plan Your Design
- Use chalk or a washable marker to sketch where you want the rips and tears. Common areas include the knees, thighs, and near the pockets.
- Consider balance—too many rips can look overdone, while too few might miss the mark.
Step 3: Protect the Back of the Fabric
Insert a piece of cardboard or a cutting board inside the jeans to prevent cutting through both layers of fabric. This ensures clean cuts and protects the backside of your jeans.
Step 4: Create the Rips
-
Cut Horizontal Slits
- Use scissors or a craft knife to make small horizontal cuts in the marked areas. The width of the cuts depends on how big you want the rip to be.
- Make multiple slits close together for a frayed effect or fewer for bold openings.
-
Fray the Edges
- Rub the edges of the slits with sandpaper or a pumice stone to soften the fabric.
- Use tweezers to pull out the vertical threads, leaving the horizontal threads intact for that classic distressed look.
Step 5: Add Wear and Tear
- For a naturally worn look, rub sandpaper or a pumice stone on areas like the thighs, knees, or hem.
- Avoid overdoing it—natural wear patterns are subtle.
Step 6: Wash and Finish
- After ripping, wash your jeans on a gentle cycle to soften the fabric and enhance the fraying effect.
- Air dry or tumble dry on low heat to maintain the distressed look.
Tips for Success
- Work slowly to avoid over-ripping. You can always add more distressing later.
- Practice on an old pair of jeans before ripping your favorite pair.
- Use white denim thread to reinforce the edges if you’re worried about the rips spreading over time.
Styling Ripped Denim
Once your customized jeans are ready, pair them with:
- Smart casual looks: A crisp shirt and loafers.
- Street style: A graphic tee and sneakers.
- Classic chic: A leather jacket and boots.
Ripped denim is versatile and timeless, making it the perfect addition to any wardrobe. With these steps, you’ll master the art of DIY distressing and create a piece of fashion that’s truly unique to you.